
Click below to go back to the hub:
Hey VideoStar,
It’s time to jump into the Advanced Resources!
Remember to take this slowwwwwly.
You DON’T need to know + implement all of this now.
And know that when I say Advanced, I do mean Advanced.
Make sure you’re feeling pretty darn comfy in the Intermediate section first.
You’ve gotta be CRAVING more tech!
Oh, a quick heads up that I’m an affiliate for some of these links. 🙂
Okay, choose ONE AREA you want to learn about and dive on in!
Remember, if you have ANY Qs, post ’em in the group.
ADVANCED TABLE OF CONTENTS
Click to skip ahead to your desired section:
STORAGE
When it comes to memory, there really is ONE level of learning (yep, this section is identical in Beginner, Intermediate and Advanced).
External storage is the KEY to making sure you give your computer the memory it needs to operate. Video can quickly eat up any computer’s memory.
Pick up an “external hard drive”, plug it into your computer and sync it (may require a Googling or two). Then simply save your videos onto this device.
BONUS TIP:
External hard drives can also be used to back up your computer. If you buy two drives, you can create a “safety” copy that you can store at a friend or family member’s home – or in your safety deposit box.
This way if anything wonky happens, you have a copy of your videos and your work off-site. Win!
(Just make sure you can update it regularly).
Here’s the brand I use:
LIGHTING
If you want your videos to look GREAT, but you don’t want to hire a pro team for your shoots, then it’s time to grab yourself some semi-pro lights.
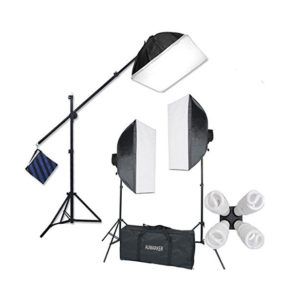
3-POINT LIGHTING
As demonstrated in the Tech-Nique Part Two training video on lighting, one option is to use a 3-point lighting set up.
No surprise, the basic set up requires 3 lights.
For my OCB + blog videos, I use a system similar to this StudioFX kit.
STUDIOFX PROS:
- I like the quality of light they cast.
- The price is a good bang for your buck.
- All-in-one kit.
STUDIOFX CONS:
- Suuuuuper awkward to assemble at first.
- With all the economic DIY lighting kits, durability and physical quality will be always an issue. They are simply not constructed as sturdily as the $1000 (per light) lights.
- Because of this, I leave my lights assembled. I don’t trust that they’ll last if I continually take them apart and put them together again. I take the units off the stands and store them as is.
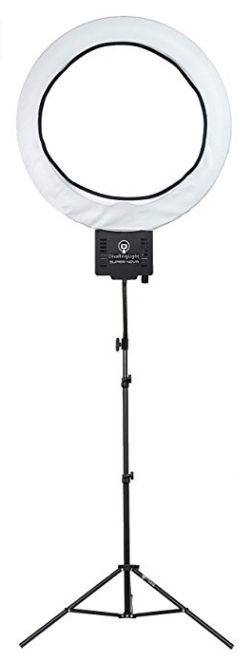 ONE LIGHT
If you want a GREAT light for creating a beautiful effect for your face, I highly recommend picking up a Diva Ring Light.
I started playing around with it for the course, and it’s FABULOUS.
It’s also the light that Youtube beauty bloggers rave about, because, literally, it gives good face. 😉
(The above link comes with a diffuser that you should use to cover the light to create a softer effect AND a stand).
DIVA RING LIGHT PROS:
- Casts a beautiful light for your face.
- Simple to set up.
Diva Ring Light CONS:
- You have to stand quite close to it to get the best effect (max 3-4 feet away).
- Anything further away won’t be lit.
CAMERA
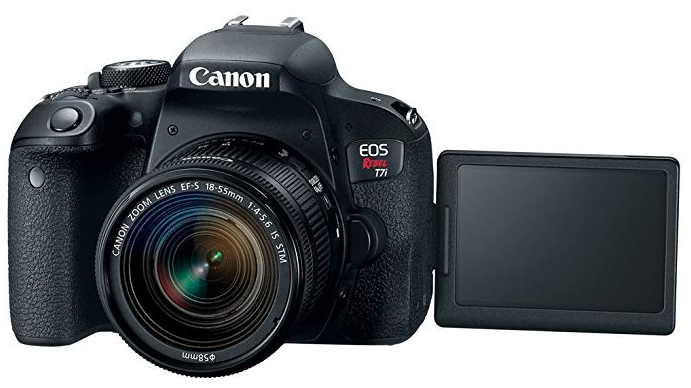
FANCY CAMERA (“DSLR”)
Advanced cameras are ones that require making use of manual settings to make the most out of them. Cameras that need you to head in and make lots of adjustment to settings, that have attachable lenses, etc.
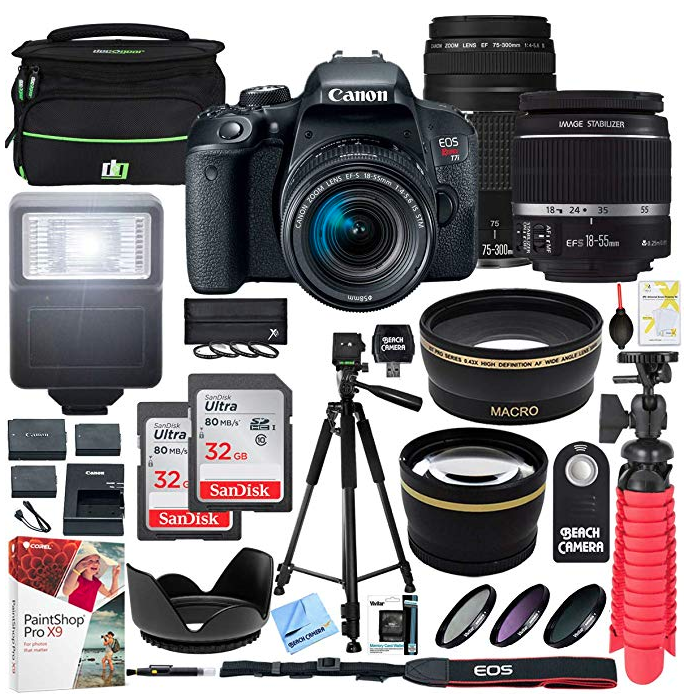
I’d recommend starting off your advanced camera journey with a Canon EOS T7i Rebel kit.
This is the kind of camera that has removable lenses and lots of customization!
It’s got all the features you need to capture great quality video.
PROs:
- The video looks AMAZING!
- This package comes with a SILENT LENS, so you can let it autofocus with ease while shooting (no loud sounds from the camera)!
- Shoot in sexy slow motion (60 frames per second).
- This camera kit has all the extras you’ll need.
- You can get that professional look of being in focus while your background is out of focus.
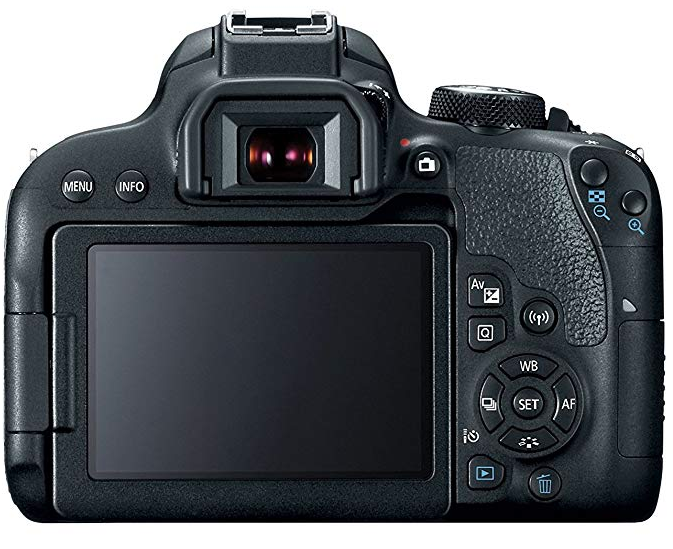
- It has a flip screen that makes your filming life easier (you can easily see what you look like).
- Has all the features you need to create beautiful videos.
CONs:
- The price can go up quickly with pro and semi-pro cameras.
- Has a steeper learning curve.
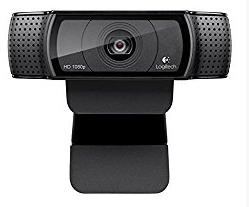
SWEEEEET WEBCAM
If you’re ready to upgrade the quality of your webcam, it’s time to grab the Logitech c920.
This pretty lil thing plugs into your computer via USB cable and makes your webcam videos look MUCH better!
PROs:
- Livestreams look great!
- Comes with downloadable software that allows you to adjust exposure, brightness and the zoom right from your computer screen.
CONs:
- The higher quality of the image produced means that it takes up extra bandwidth. So if your internet isn’t super strong, your livestream will be choppy.
SOUND
IMPORTANT TERMS (Reminder):
Lavalier – A small mic that you can pin to your shirt.
Wireless lavalier – there is no wire physically connecting you to your camera, so you can move around with ease. No more accidentally knocking the camera over when you go answer the door (hehe).
Wired lavalier – there is a wire that connects the microphone to your camera. So make sure you unplug before you go answer the door.
Shotgun microphone – larger mics that you’d place on your desk (think podcasters).
Groovy!
Here are the mics I recommend at this intermediate level.
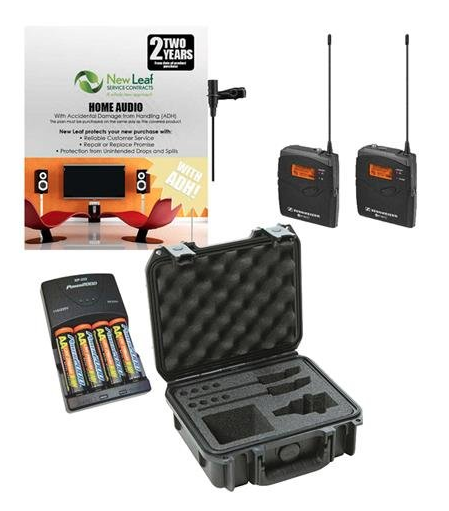 For top notch sound, I recommend a Sennheiser Lavalier Wireless mic
.
I bought my Sennheiser because I was shooting and directing documentaries and short films and needed something reliable for guerilla-style shooting.
NOTE: ONLY upgrade to this if you’re unhappy with the Intermediate options and want pristine sound.
PROS:
- Captures great quality sound!
CONS:
- MUCH more technical in getting it to sync with your camera! Could be a real headache for you.
- Price – expect to pay $600 USD+.
KEEPING THE CAMERA STEADY
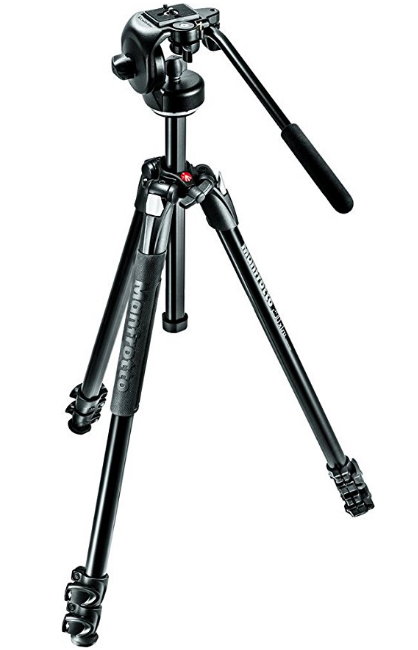 I personally use a pro tripod because it is extra sturdy and gives me peace of mind that my camera won’t get easily knocked over. If you want to go this route, I suggest this Manfrotto 2-Way Kit
.
PROs:
- Sturdy! Great if you’re using a heavy or expensive camera!
CONs:
- Price can climb quickly with pro tripods.
EDITING
If…
- You’re ready to hire someone to edit for you
- OR you’re already comfortable using the intermediate editing software AND you want your videos to have much GREATER professionalism
… then it’s time to PRO up!
HIRING THE PROs:
You essentially have two options here:
- Hire a storytelling, professional editor (like myself) for your special videos.
- Hire someone who edits on the cheap.
PROs:
- When you hire a storytelling, professional editor, you get what you pay for. You get a beautifully crafted edit of your video. You’ll get the best possible result with your footage. They use years of training to create masterful versions of your video.
- When you hire someone who edits on the cheap, they’ll be able to cut together your regular, non-fancy videos.
CONs:
- Hiring a storytelling, professional editor adds up quickly, because they are truly crafting the best way to tell the story. That is why I recommend hiring them for your important videos that need a magical touch.
- Hiring someone who edits on the cheap won’t work well for your special videos. You won’t get the best possible results.
UPGRADING TO PROFESSIONAL EDITING SOFTWARE:
I mostly use Final Cut Pro 7 (only for the SUPER AMBITIOUS, TECH-FRIENDLY folk who want to become editors). It’s a very complex (and versatile) program, not for the (techie) faint of heart.
However, this software stopped receiving updates from Apple in 2011, so it is obsolete for the latest computers and operating systems.
PRO SOFTWARE I RECOMMEND:
Final Cut Pro X (has a 30-day free trial).
Adobe Premiere (has free trial, full version is on a monthly subscription model).
Pro software PROS:
- Amazing customization and file management for your videos.
- Powerhouses for ALL things video editing.
Pro software CONS:
- Suuuuper steep learning curve – may serve to distract you from other important things, like you know, filming videos and running your biz.
- Tech-heavy – may just frustrate you and make you not want to edit.
- More expensive than the Intermediate options.
MUSIC
An important heads up that you need to use either “Royalty Free” music OR music that you have written permission to use.
Here are some great resources to Royalty Free music sites:
I use this for ALL my biz + course videos (plus some of my arts films).
Has a FREE option. Must properly credit the company in your video. Can’t use the free option for podcasts.
TELEPROMPTER
Want to read your video script and appear as though you’re looking into the lens?
Then it’s time to use what’s called a teleprompter!
Here’s how it works:
On a computer:
- Visit a free teleprompter site like CuePrompter.com.
- Set it to “narrow” (this keeps your eye movement to a minimum).
- Paste your script in the field and click “Start Prompter”.
- Set it up so that the top of your script is as close to your webcam lens as possible.
- Use your up and down arrows to speed up or slow down the scroll.
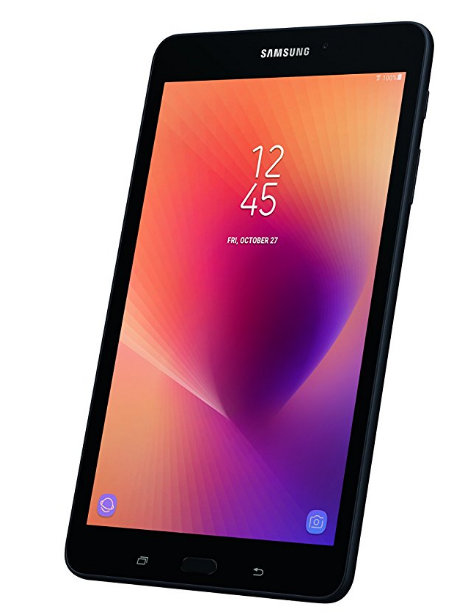
On a smartphone or tablet:
Download the app to your smartphone or tablet (links are below).
If you’re okay with your eyes being a bit off of the lens, (it will kinda look like you’re reading), then you can simply paste your script into the app, press the record button and start the words scrolling through the app.
Some devices can’t handle when the app records and scroll, so you may need to buy a separate tablet/phone – So you’d have one device to do the recording and the other device just underneath to do the scrolling.
For a dedicated camera:
You can place your tablet just under your camera lens and run the teleprompter app.
However, be aware that this still is an imperfect fix, and you’ll likely notice your eyes moving while you’re reading.
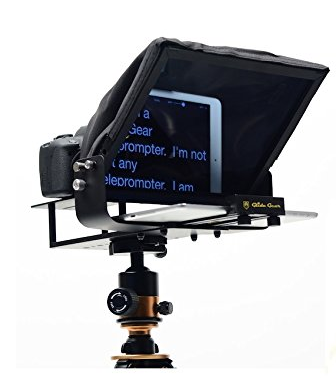
The primo solution:
If you want it to appear as though you’re looking directly at the lens, then you’ll want to grab something a bit MORE ROBUST (link is below).
How it works – the more robust teleprompter reflects the words scrolling up your tablet onto a sheet of glass. This glass rests in front of your camera lens. So essentially, you’re reading right through the lens.
Yadda yadda … it looks the best!
Bam! #EyeContact
HERE’S YOUR TELEPROMPTER SHOPPING LIST:
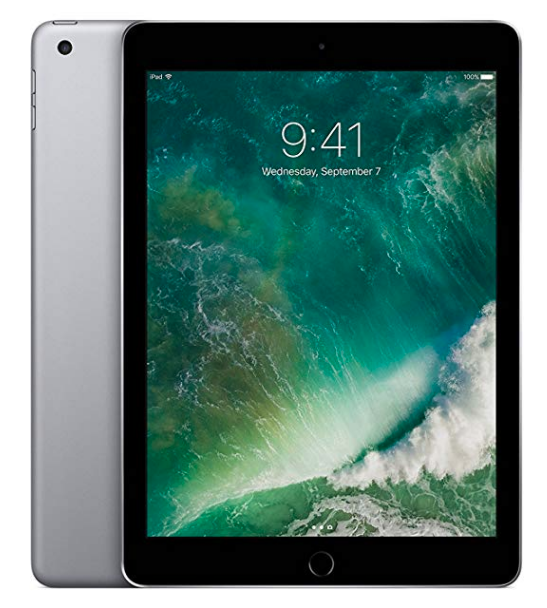
APPLE:
Need a tablet to scroll your text on? Grab it below:
TELEPROMPTER SYSTEM PROs:
- Read from your scripts while filming.
- The more robust teleprompter set up puts your video script right in line with your lens so it REALLY doesn’t look like you’re reading.
- You can adjust the reading speed to YOUR needs.
TELEPROMPTER SYSTEM CONs:
- When you’re just getting started making videos, this adds another layer of technology for you to figure out and troubleshoot.
- Be careful of technology overwhelm here.
BUMPER
It’s the graphics/photo thingee with music underneath it that goes at the beginning and ending of videos (mine has my company name and shining sundogs in it).
SEE:
Keep in mind that your Bumper should do 4 key things:
- Include your and/or your company’s name.
- The name of the video series/channel, if it has a name. (Like if I wanted my video blogs to be called say, Shine-TV, or something.)
- Set the tone and vibe of you and your biz (playful, uplifting, empowering, etc).
- Grab your dream clients’ attention.
HOW TO GET ONE:
- You can DIY one that has no fancy graphics, in either Screenflow or Camtasia. Simply build it, export that file and then import the .mov file into each of your projects.
- If you want a fully customized bumper (YESSS)!, it’s time to outsource to someone like myself, who knows how to use animation software and has a creative eye.
- Or you can get a simple bumper made with your logo and tagline from Splasheo. They have pre-made templates you can choose from. They simply add in your logo, name etc.
DIY PROs:
- You have something that is branded, that you can put at the start and finish of your videos.
DIY CONs:
- It’s not as professional as the outsourcing options.
OUTSOURCING PROs:
- Takes the tech headache away.
- Have a beautiful, branded, professional intro and outro for ALL your videos.
OUTSOURCING CONs:
- If you go fully customized, it can cost $800+ to hire someone to make your bumper.
BACKDROPS
Don’t want to use your own home/office as the backdrop and want something simple behind you?
Groovy! It’s time to purchase OR make a backdrop for your videos.
There are a few Qs to ask yourself:
- Do you want to include your brand colours?
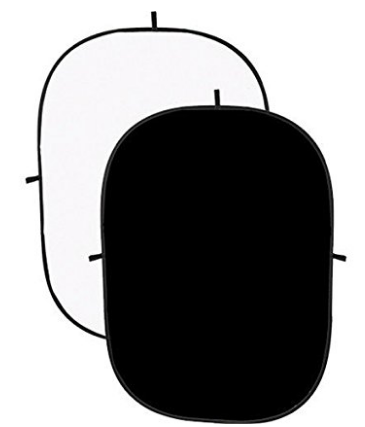
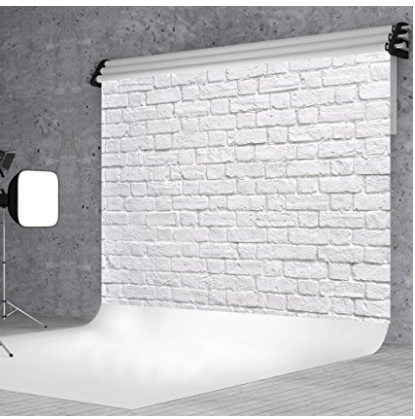
- Do you want that clean bright white background look?
- How do you want your backdrop to feel?
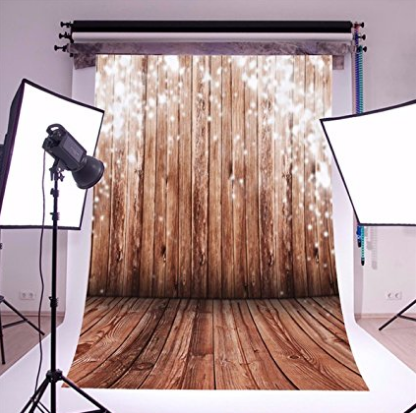
- Do you want it to be plain, sparkly, textured?
- Do you want to create it yourself?
CREATING A BACKDROP:
I don’t have the gift of making my own backdrops, lol.
So here are some ideas:
- Hire a friend who has a GREAT flare for interior design.
- Use your own creativity and build something that fits your brand.
- Check out this Pinterest search for ideas.
- Check out this Google image search for more ideas.
PURCHASING A BACKDROP:
PROS:
- You can brand-up your video.
- Control where people’s eyes are focused (i.e. on YOU).
CONS:
- You may need to try out a few different backdrops until you find the right one for YOU.
- You need to invest a bit of time researching the backdrops out there.
IT’S TIME TO BROWSE:
If you want to see the world of beautiful backdrops, then head straight here and browse to your heart’s content. They literally have EVERYTHING you could possibly want in a backdrop.
Loads of inspiration for ya!
NOTE: Aim for ones that are at least 5 feet wide.
If you have any Qs about the ones that you’re eying, simple tag me in the group and include a link to the backdrop in question.
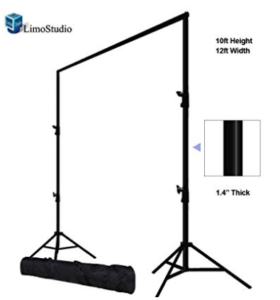
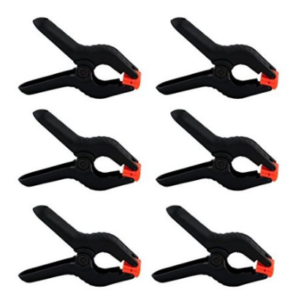
BACKDROP STAND AND CLIPS:
You’ll need some accessories to hang up your backdrops.
Grab these stands and these clips to make your setup life easier.
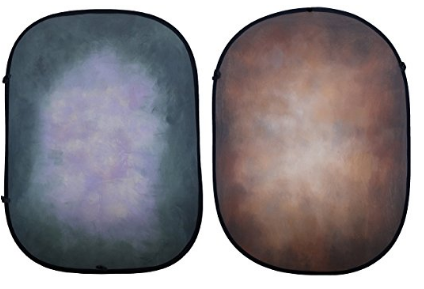
FAST-SHOPPER COLLAPSIBLE BACKDROP LINKS:
If you’re not in the mood to do a big ol’ browse at the link I mentioned above, below I’m going to include links to some specific backdrops for ya.
Here are some quick links to backdrops you can use (they’re about 5′ x 7′ in size).
The price range for backdrops is generally from $40 – $300 (the more detailed the look, the bigger the investment).
These ones are collapsible, portable and easy to use:
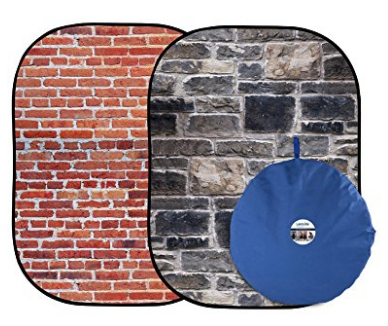
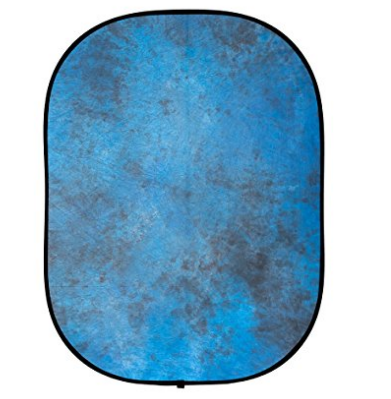
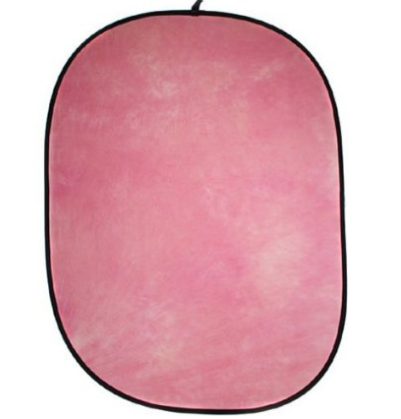
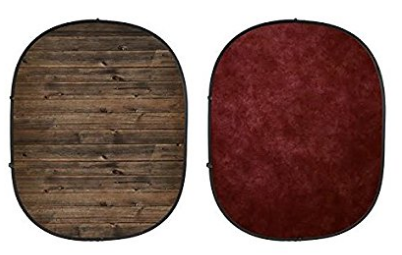
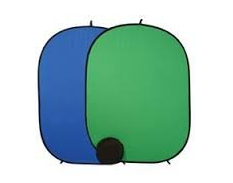
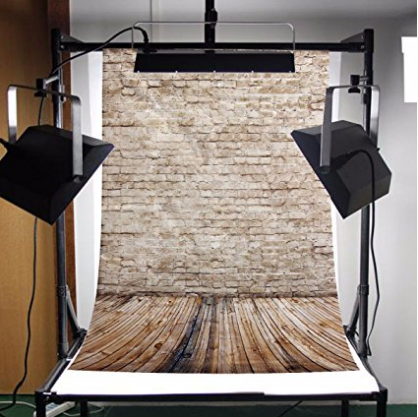
FAST-SHOPPER FUN BACKDROP IDEAS:
Want to spice up your backdrops? Here are some examples of what’s out there to help inspire you!
Click on ’em to get more details:


FAST-SHOPPER SIMPLE PAPER BACKDROP LINKS:
Paper backdrops are not quite as easy to set up as their collapsible siblings above. But they give you wayyyy more colour options.
Simply mount the roll at the top of your backdrop stand and then you unroll it so it touches the ground. keep it in place at the bottom with a simple weight (like a book or a paper weight).
Here are some popular ones for ya!
Click below to get more deets:


Feel free to browse at the above sites to find the look that feels right for you and your biz!
BONUS TIP:
If you want to check out backdrops in person, visit your local PRO photography and video shops. They usually have them on stock.
BRING your camera and SEE how you look in front of them!