
Click below to go back to the hub:
Hey VideoStar,
Yay, it’s time to make for videos look and feel a bit more profesh. #babysteps
The Beginner Resources keep things simple.
It’s all about making your future videos ACHIEVABLE.
There’s no point upgrading too fast and sending yourself into tech overwhelm.
The beginner level is all about using what you already have and outsourcing –
With ONE exception – the very first category (storage) is something you need at ALL levels.
Okay, have a looksie.
And remember, if you have ANY Qs, post ’em in the group!
Oh and some links here are #affiliate links. 🙂
BEGINNER TABLE OF CONTENTS
STORAGE
When it comes to memory, there really is ONE level of learning (yep, this section is identical in Beginner, Intermediate and Advanced).
External storage is the KEY to making sure you give your computer the memory it needs to operate. Video can quickly eat up any computer’s memory.
Pick up an “external hard drive”, plug it into your computer and sync it (may require a Googling or two). Then simply save your videos onto this device.
BONUS TIP:
External hard drives can also be used to back up your computer. If you buy two drives, you can create a “safety” copy that you can store at a friend or family member’s home – or in your safety deposit box.
This way if anything wonky happens, you have a copy of your videos and your work off-site. Win!
(Just make sure you can update it regularly).
Here’s the brand I use:
LIGHTING
- Face the window.
- Avoid direct sunlight hitting you (you may need to figure out what time of day works best so the sun doesn’t directly light you), it’s the most flattering light when it’s “indirect”.
When shooting outside:
- Avoid windy days.
- Shoot in your garage with the door open (face the opening).
- Avoid direct sunlight, if you can.
- Best light is on days when it’s a bit overcast (not stormy). The cloud acts as a natural diffuser, and is flattering for your face.
- Avoid shooting between 11am and 1pm. The sun is almost directly overhead, and causes suuuuper unflattering shadows on your face.
PROs:
- Nothing technical to learn.
- Is great for more casual, on-the-fly, slice of life videos.
CONs:
- You have zero control of the conditions and are reliant on mother nature for when you can shoot.
- When you work in changing lighting and sound conditions, it makes it more difficult to edit your footage.
- Doesn’t work great for videos that need to look more professional.
CAMERA
EASY PEASY SOLUTION:
Use your smartphone, tablet or webcam – something you’re already okay using!
PROs:
- Easy to get started.
- Easy to continue making videos. #momentum
- Easy to make videos spontaneously.
CONs:
- Limited features.
- Can quickly burn up the storage space on your device.
- If it’s longer than a few minutes long, it can be difficult transferring footage from your device to your computer or external hard drive (you’ll need to download third party applications to transfer the footage).
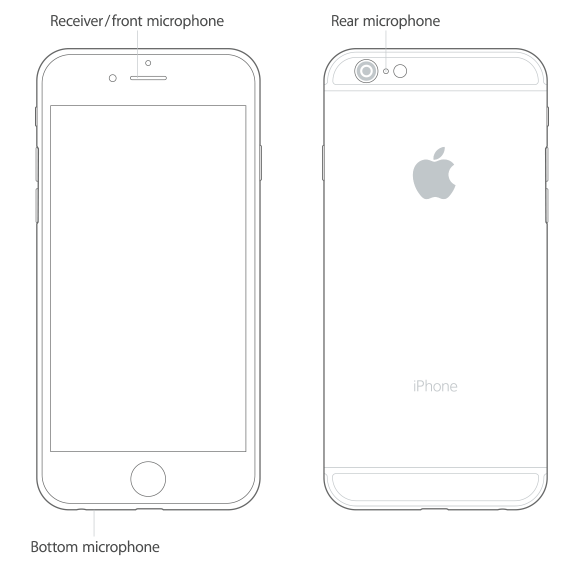
SOUND
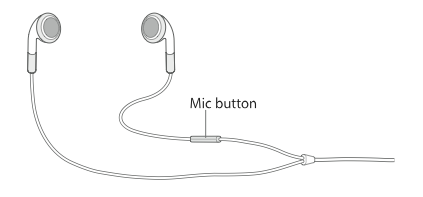
Another option that I use sometimes is the earbud that comes with my iphone. It doesn’t look great, but it’ll do the job SIMPLY.
What you’re looking for is the ones that have a microphone built-in, that you can use when making a call.
Simply plug it into your phone, press the record button and use it in the same way as you would for making a call.
PROs:
- Keeps your audio simple.
CONs:
- The quality of the audio will be unreliable and not nearly as sweet as the intermediate and pro options.
KEEPING THE CAMERA STEADY
But let’s start you off with the EASY PEASY OPTION:
- Rest your hand or elbow on something solid.
- Steady your camera on a shelf, table, pile of books, etc.
- Don’t worry about it for now, let the shaky camera rule. 😉
PROs:
- Using this simple option at the beginning of your video journey just makes it easier to do your practice videos.
CONs:
- Arm gets tired, lol.
- Can be tough finding a shelf or books the right height.
- Will be shaky until you get the hand of it.
EDITING
EASY PEASY:
1. Don’t edit. At the beginning, you don’t want to give yourself any reason to NOT press that record button. The one thing to know is to make sure that there aren’t any suuuuper awkward, icky moments, if you plan to post the video publicly.
2. Outsource to a video editor – I recommend pro editors (such as myself) for your special videos that need that extra love.
OUTSOURCING PROs:
- Take away the headache + time of learning this skill.
- Have a professional (like myself) assemble all your footage into an AMAZING final product.
- Instantly, your videos will feel 1000x more professional.
OUTSOURCING CONs:
- Not all video editors are created equal. Make sure you check out samples of their work and ask yourself if the quality and flow feels professional enough for your videos.
- Pricey – You should be prepared to spend some moolah for pro editors. An editor worth her salt has invested many years learning the craft, and creating quality edits takes time and know-how.
BACKDROPS
EASY PEASY:
Use your home, office, neighbourhood, town and city!
PROs:
- You don’t need to do a lot of set up.
CONs:
- May limit the creative, branded vibe of your videos.
- You may need to declutter, buy props or rearrange some furniture.